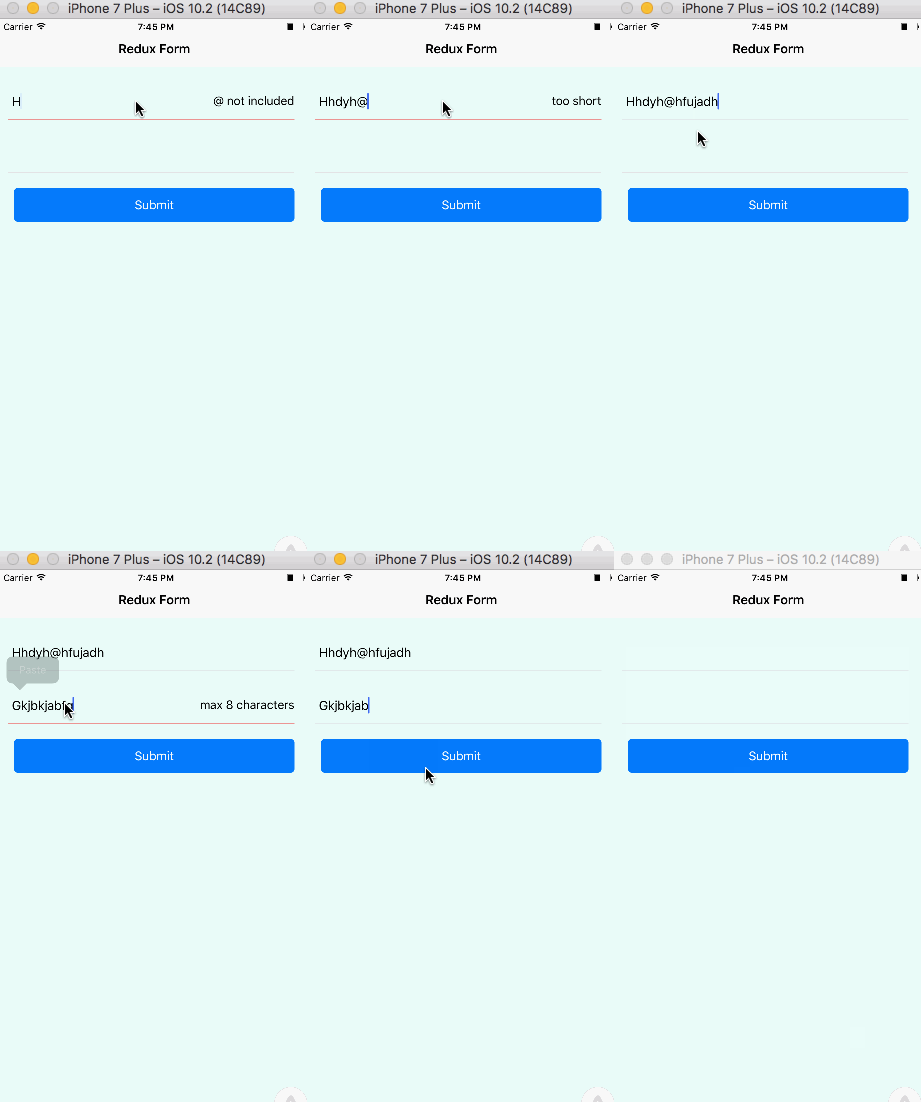
Redux Form Example
Redux Form is a sample app made with React Native, Redux, and Redux-Form and NativeBase as the main Libraries at work here.
This is a simple step-by-step tutorial to get familiar with basic concepts of Redux (used for state management), and Redux-Form. This simple App should get you familiar with these Libraries and their use case.
Find Full code here

1. Aim
We aim to create a single page application that uses Redux-Form and has validation functionality.
2. Installation
- SetUp React Native Project
SetUp a React Native project. Refer this for more information about setting up a React Native project. - Installing Libraries
With a React Native project SetUp, We can now install all required Libraries as follows.
a. Redux and react-redux
In your terminal enter the following
npm install redux react-redux --save
b. redux-form
npm install --save redux-form
c. NativeBase
npm install native-base@2 --save
Configure all dependencies by running the following command
react-native link
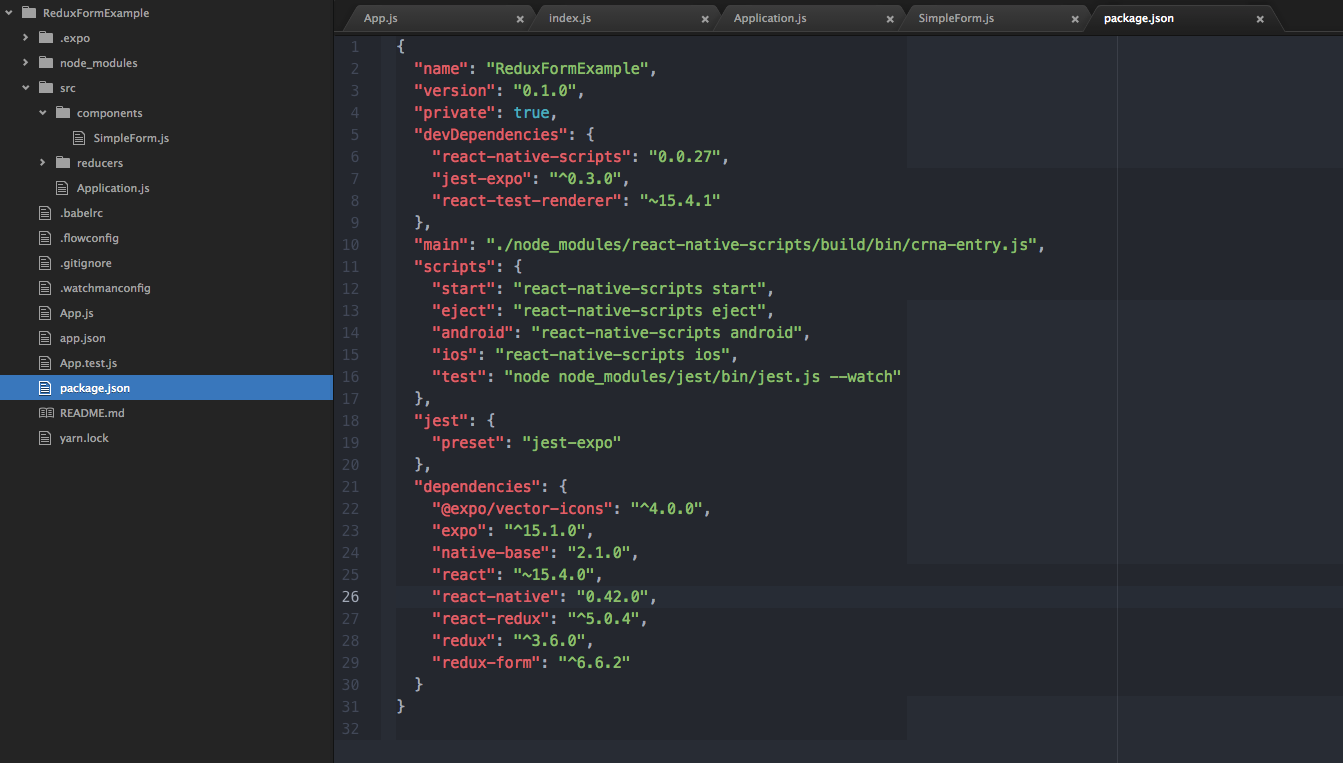
Note: You might have some problems setting up the project due to version conflicts, make sure you use same versions as mentioned below in the package.json
By the end of Installation, your package.json file should look something like this.

3. SetUp
Create a src folder at root of your project. Create folders components reducers and one file Application.js for our App.
3.1. Reducers
Create a file index.js inside reducers folder. Paste the following code.
Code src/reducers/index.js
import {combineReducers} from 'redux';
import { reducer as formReducer } from 'redux-form';
const reducers = {
  form: formReducer
}
const allReducers= combineReducers(reducers);
export default allReducers;
3.2. Component
Create a file SimpleForm.js inside components folder.
Code src/components/SimpleForm.js
import React , { Component } from 'react';
import Expo from 'expo';
import { View } from 'react-native';
import { Container, Item, Input, Header, Body, Content, Title, Button, Text } from 'native-base';
import { Field,reduxForm } from 'redux-form';
const validate = values => {
  const error= {};
  error.email= '';
  error.name= '';
  var ema = values.email;
  var nm = values.name;
  if(values.email === undefined){
    ema = '';
  }
  if(values.name === undefined){
    nm = '';
  }
  if(ema.length < 8 && ema !== ''){
    error.email= 'too short';
  }
  if(!ema.includes('@') && ema !== ''){
    error.email= '@ not included';
  }
  if(nm.length > 8){
    error.name= 'max 8 characters';
  }
  return error;
};
class SimpleForm extends Component {
  constructor(props){
    super(props);
    this.state={
      isReady: false
    };
    this.renderInput = this.renderInput.bind(this);
  }
  async componentWillMount() {
      await Expo.Font.loadAsync({
        'Roboto': require('native-base/Fonts/Roboto.ttf'),
        'Roboto_medium': require('native-base/Fonts/Roboto_medium.ttf'),
      });
      this.setState({isReady: true});
    }
  renderInput({ input, label, type, meta: { touched, error, warning } }){
    var hasError= false;
    if(error !== undefined){
      hasError= true;
    }
    return(
      <Item error= {hasError}>
        <Input {...input}/>
        {hasError ? <Text>{error}</Text> : <Text />}
      </Item>
    )
  }
  render(){
     const { handleSubmit, reset } = this.props;
     if (!this.state.isReady) {
      return <Expo.AppLoading />;
    }
    return (
      <Container>
        <Header>
          <Body>
            <Title>Redux Form</Title>
          </Body>
        </Header>
        <Content padder>
          <Field name="email" component={this.renderInput} />
          <Field name="name" component={this.renderInput} />
          <Button block primary onPress= {reset}>
            <Text>Submit</Text>
          </Button>
        </Content>
      </Container>
    )
  }
}
export default reduxForm({
  form: 'test',
  validate
})(SimpleForm)
Explained
- We load fonts using
loadAsyncas defined in previous examples. - Note how we have added validate functionality in the end using
reduxFormdecorator. - Conditions added to validate are user defined.
3.3. Application
Code src/Application.js
import React , { Component } from 'react';
import allReducers from './reducers/index.js';
import {createStore} from 'redux';
import {Provider} from 'react-redux';
import SimpleForm from './components/SimpleForm.js';
import { Field, reduxForm } from 'redux-form';
const store = createStore(allReducers);
 export default class Application extends Component{
  render(){
    return(
      <Provider store= {store}>
        <SimpleForm />
      </Provider>
    )
  }
}
Explained
Here we import allReducers containing our formReducer and add it to our store. Next we simply pass our store to Provider component.
3.4. Finishing Up
Finally add the Application component in our App.js as follows
Code App.js
import React from 'react';
import { StyleSheet, Text, View } from 'react-native';
import Application from './src/Application.js';
import allReducers from './src/reducers/index.js';
import {createStore} from 'redux';
import {Provider} from 'react-redux';
import { TextInput, TouchableOpacity } from 'react-native';
const store = createStore(allReducers);
export default class App extends React.Component {
  render() {
    return (
      <Application />
    );
  }
}
All done. Our App must work now. It looks awesome(unicorn alert). Build and run for magic.