Basic RNRF Example App and Tutorial
This is a simple 2-page application that demonstrates the basic usage of React Native Router Flux as a navigation tool. It is extremely easy to understand. This step-by-step tutorial will take you through the basic concepts. We are using NativeBase as the UI library to design our pages.
Find full code here
1. Aim
We are creating a 2-page application with a button on each page that takes us to the other page onPress.
2. Installation
Note: If you encounter an issue with React Native Router Flux during building your project, it might be due to issue with latest versions of React Native. Check out this issue. You might have to bump down the versions of React Native and React
- SetUp React Native Project
SetUp a React Native project. Refer this for more information about setting up a React Native project. - Installing Libraries
With a React Native project SetUp, We can now install all required Libraries as follows.
a. React Native Router Flux
npm install react-native-router-flux --save
b. NativeBase
npm install native-base@2 --save
c. Configure dependencies
react-native link
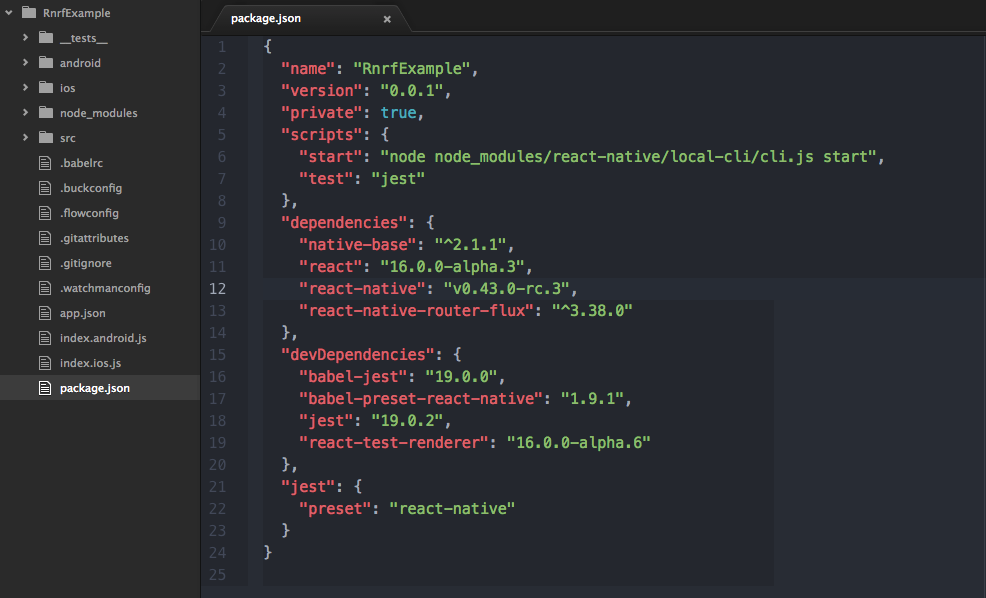
By the end of Installation, your package.json file should look something like this.
3. Lets Play
With our basic project setup we can now start building our App.
Make a folder at the project root by the name of src. Inside this folder we make 3 files.
3.1. App.js
This file is where our app lives. This is where we setup our navigation library React Native Router Flux.
Some components from React Native Router Flux are worth understanding.
Router Component: This component is the parent component inside which we pass all other Page components that are part of our Navigation objective.Scene Component: We pass our Page components toScenethroughcomponentprop as shown below.
Thekeyprop is used to reference our component when we wish to switch aScene.- We are going to be optimistic and assume that our Page components are made. Hence we import out page components and pass them to
Scene.
Code
import React, { Component } from 'react';
import { Router, Scene } from 'react-native-router-flux';
import PageOne from './pageOne';
import PageTwo from './pageTwo';
export default class App extends Component {
  render() {
    return (
      <Router hideNavBar= "true">
        <Scene key="root">
          <Scene key="pageOne" component={PageOne} title="PageOne" initial={true} />
          <Scene key="pageTwo" component={PageTwo} title="PageTwo" />
        </Scene>
      </Router>
    )
  }
}
3.2. PageOne.js
This page will simply have one Button to take us to next page.
We will fire an Action onPress of this Button.
Note: We will use RNRF to navigate between screens, hence in the code below, we import Actions from RNRF and we have added Actions.pageTwo() as an onPress event on the button which will take us to the PageTwo Screen.
The general syntax to navigate between screens in RNRF goes like :-
Actions.ACTION_NAME(PARAMS)ACTION_NAME in the key prop of Scene component back in out App.js file
Code
import React, { Component } from 'react';
import { Container, Content, Text, Card, Header, Body, Button, Title, CardItem } from 'native-base';
import { Actions } from 'react-native-router-flux';
export default class pageOne extends Component {
  render(){
    return(
      <Container>
        <Header>
          <Body>
            <Title>PageOne</Title>
          </Body>
        </Header>
        <Content padder>
          <Card>
            <CardItem>
              <Body>
                <Text>
                  This is Page One, Press button to goto page two
                </Text>
              </Body>
            </CardItem>
          </Card>
          <Button dark bordered style = {{alignSelf: 'center', margin: 30}}
            onPress= {() => {Actions.pageTwo(); }}>
            <Text>Goto Page 2</Text>
          </Button>
         </Content>
      </Container>
    );
  }
}
3.3. PageTwo.js
This page will simply have one Button to take us to the previous page.
We will fire an Action onPress of this Button.
We will use Actions.pop() to return to previous page.
Code
import React, { Component } from 'react';
import { Container, Content, Text, Card, Header, Body, Button, Title, CardItem } from 'native-base';
import { Actions } from 'react-native-router-flux';
export default class pageTwo extends Component {
  render(){
    return(
      <Container>
        <Header>
          <Body>
            <Title>PageTwo</Title>
          </Body>
        </Header>
        <Content padder>
          <Card>
            <CardItem>
              <Body>
                <Text>
                  This is Page One, Press button to goto page two
                </Text>
              </Body>
            </CardItem>
          </Card>
          <Button dark bordered
            onPress= {() => {Actions.pop(); }}>
            <Text>Goto Page 1</Text>
         </Button>
        </Content>
      </Container>
    );
  }
}
3.4. What Next?
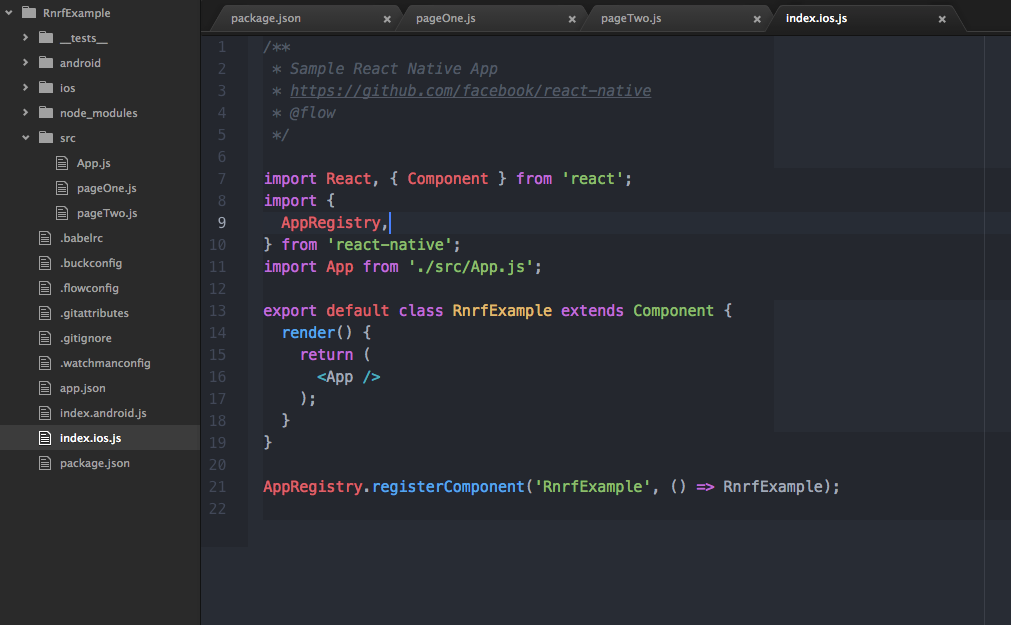
Well, we are pretty much done. Next we simply import our App component in our index.js file. The file and folder structure will look something like this.
Code
import React, { Component } from 'react';
import { AppRegistry } from 'react-native';
import App from './src/App.js';
export default class RnrfExample extends Component {
  render() {
    return (
      <App />
    );
  }
}
AppRegistry.registerComponent('RnrfExample', () => RnrfExample);